Showing posts with label spaceship. Show all posts

Thursday, August 4, 2016

An Old Man Looks at

For the most part, the things I review or talk about are those that excite me enough to sit down at the keyboard.  That means most of my posts are about things that I like, and that's a lot of things.  I like liking things.

That's not always the case, though.  At the risk of sounding like a ranty old fuddy-duddy troll, there's a trend I've noticed of games that just don't look at all appealing.  The blandly named Darkness Sabotage is one such game.  Let's get cynical and self-deprecating about it for a bit, shall we?

There seems to be a trend out there for big box co-op board games with enormous figures, massive amounts of equipment, and hefty price tags.  The latest offering to cross my awareness is the beast that is Darkness Sabotage, the Boardgame.  The backstory is something about 4 to 6 pirates(?) looting a chaos-hellship(?).  It's hard to tell from the KickStarter what's going on there, they seem to want the characters to be dark and brooding anti-heroes and heroic attack-the-gates-of-hell types at the same time.

Honestly, with concept art like this...
...and a strong suspicion that none of the figures in the box are built to scale with anything else on the tabletop, it doesn't really matter.  The clumsy poses, the weird balance, the odd choices for detailing, and the general 'feel' of the game just rubs me the wrong way top to bottom.  Even the strangely distended anatomy hurts my eyes, and I'm a guy that likes the impossible bone structure of your standard Space Marine.  The makers of this project seem to be trying so hard for each figure to look awesome, that they forgot to make them look good. 

Then there's the mess of accouterments needed to play the game.  Twenty dice in two different styles, countless cards, counters, and chits, and your bog-standard chaos style enemies with various special abilities seems way over the top.  If you need all those sub-systems to craft a decent game maybe you need to sit down and re-think the game's concept.  It worked in 1970's games because we didn't know any better, and it works in the OSR RPGs because that's a very different play style paradigm.  Here it just makes the prospect of picking up the rules make me tired.  I'm already a tired old man looking up at the chalk writing on the ceiling rafters and mentally measuring the rope, don't encourage me.

Then there's the recent trend towards multi-player, but co-op against the game, style games of which this is a proud member.  So it takes multiple players to beat the artificial system behind the game.  Every co-op game that I've played wound up feeling like I was playing solitaire, but in a way that forced me to jostle somebody else's elbows and wait until flipping over the next card.  This game could break that mold, but that's a hard sell for this grognard.

Especially with a price tag of ninety bucks.  If the game is any fun at all, they should be able to produce a map and counter version for twenty bucks that retains the exact same feel.

Taken altogether, it just seems like one big slapdash disaster of a game to me.  Yet somehow this Homer Simpson Car of a game earned around $150,000 in backing.  And this is just the latest in a series of games I've seen lately.  So somebody must like this style of board game play.  Probably those dang degenerate kids doing doughnuts on my lawn.  If this is what the cool kids are playing these days, pass me my 48-page OSR rulebook and six polyhedral dice, because that's all I need for an evening of fun.  You kids can keep this over-priced box of disaster for yourself.

If you disagree with my assessment, no hard feelings.  To show you it's nothing personal, here's that link to the KickStarter a second time. Now it's time to soak my dentures, drink some ensure, and check the TV guide to see what sort of hi-jinks that Gilligan will get up to this week.

Saturday, January 12, 2013

Moving on...

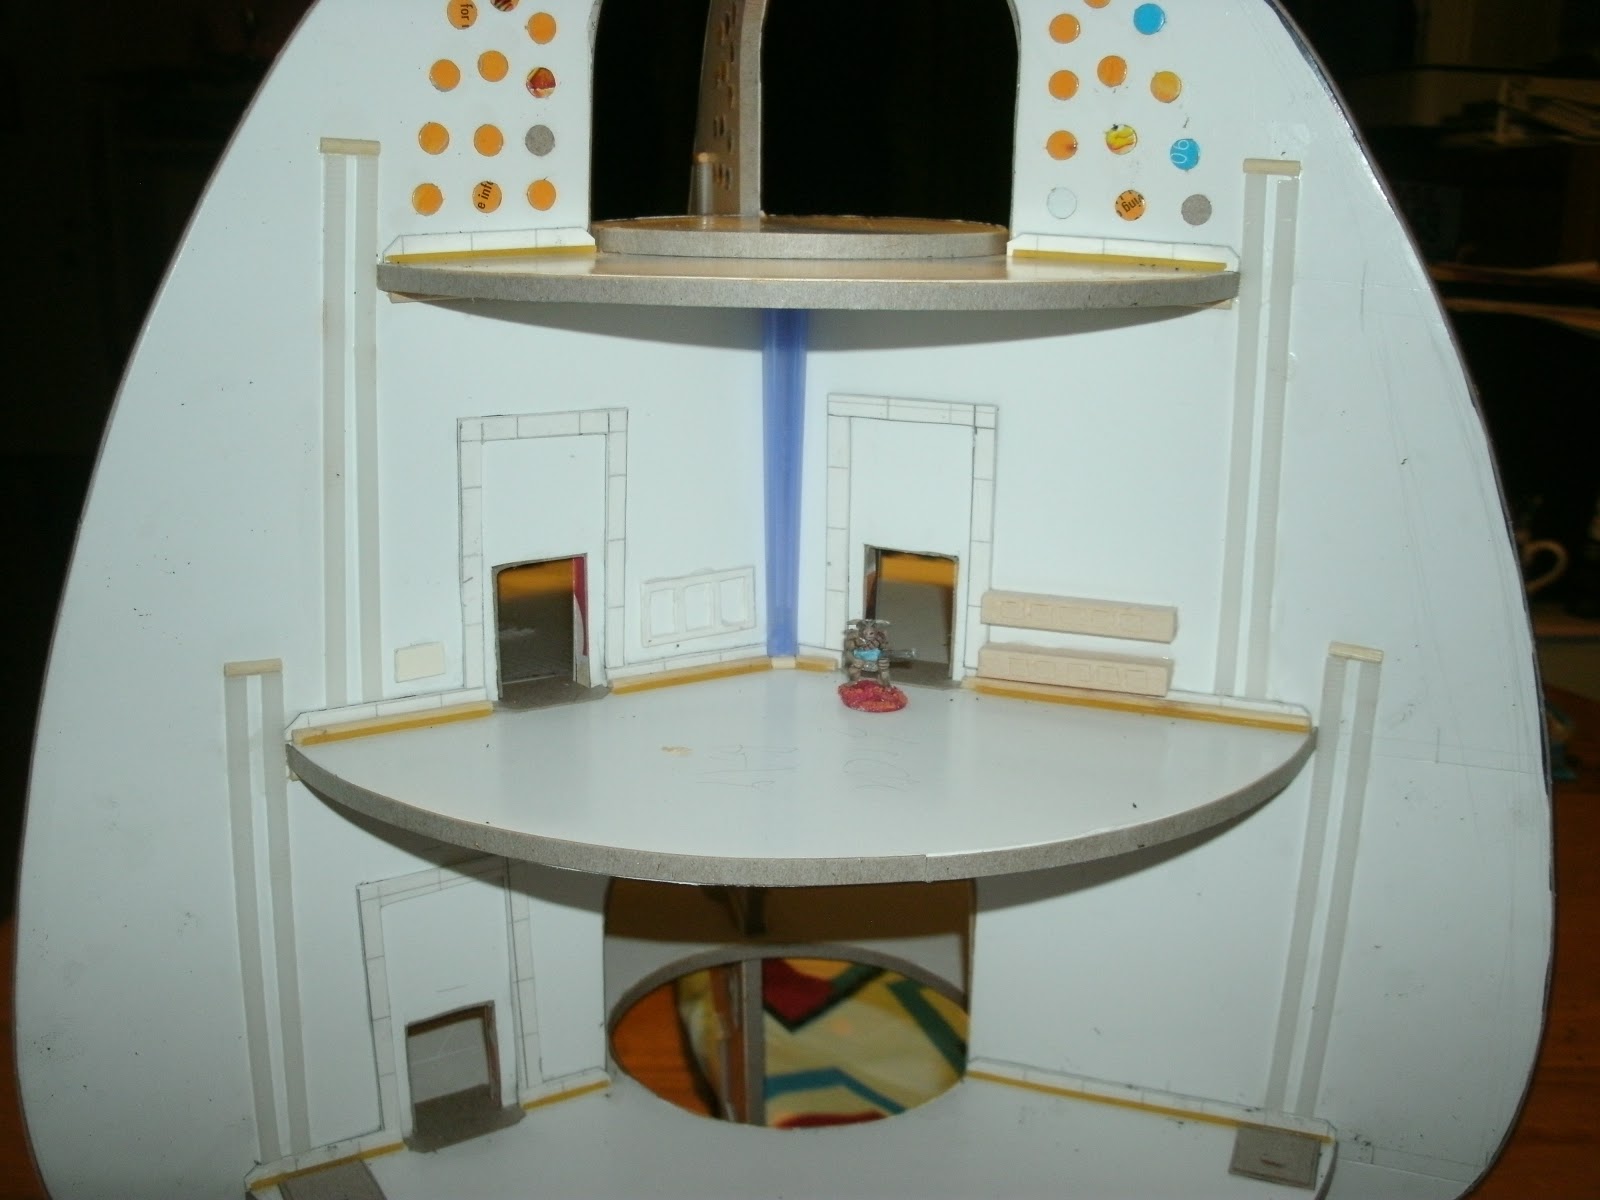
The big rocket served us well, and will continue to do so in the days to come.  But it's been a project almost 4 months in the making, and I'm getting a little eager to move on to something more traditional.  S'okay, though, because it's done enough for government work, and it meets my criteria - I've played two games on it, so I'm free to move on.  Before I dive into the new stuff, though, here's a last look and the semi-final rocket in all of its 15mm glory:


Thanks for watching along, and all the encouragement and feedback.  It really helps keep me motivated.  Don't be surprised if we revisit the rocket later; I can see three blank rooms that need filling with bunks, hydroponics, and *mumble mumble* something spacey *mumble.  I'd also like to get some slick little one-seater canons to put on those small side pods.  Oh, and the bottom floor on that last picture would make a great shuttle bay, if I can find a suitable figure.  That hole in the middle floor need a railing, and...well, you get the idea.

Next up, more Pocketmunda terrain.

Wednesday, January 9, 2013

Medic!

The Big Ship already has a med-tank for fixing Wampa bites, but it needs a medical bunk for less invasive and critical care.  Hence, the med-scan bunk.  This doohickey was built from card stock and wood bits.


With paint it looks a lot more medicish:
Put it inside a sterile environment and it looks even better:


Monday, January 7, 2013

The Most Wonderful Time of The Year (Is Over)

Of course the title of today's post is referring to college football season (and the reason for my recent silence).  January 1 really needs to be rechristened as the Feast of Saint Football.  Congratulations to Alabama - it's nice to have a legitimate national champion again. Sad as it is to know that we are now eight months away from the next college football game, at least it frees up a little more time for wargaming.  Who knows, maybe I'll even be able to squeeze in a game or two before the next kickoff.

Two minor updates today:

I did add drums to the cargo bay.  Poking around the hardware store, I found small plastic spacers in the hardware aisle with the bolts and screws and whatnot.  They are the perfect size and shape for drums, they just needed a small hole-punch sized lid and a few painted on labels to complete the look.  
Drums added to the cargo bay add a little more
clutter and flavor to the room.
The kitchen is now furnished.  The paint job on those cabinets is pretty weak, but the table turned out okay.  That's a pretty hefty table without a lot of legroom, but it should stand up to the rigors of play.  The chairs might not do so well, though.  They are constructed of bits of cereal box cardboard glued to small wooden pegs.  You can buy those pegs at the hardware store for a couple of cents each - they are designed to plug the holes left by screws when you build furniture, but they are great little bits with all sorts of uses.  These are the same bits I used to build the pots for the plants.

A nice comfortable place to rest your head while the
chestburster alien-baby claws its way out of your belly.


Tuesday, January 1, 2013

The Cargo Bay

This cargo bay is off to a good start.  As it stands, it's kind of like a rock band - it's just not complete without any drums.  It looks a little sparse, but I don't want to take up too much valuable gaming real-estate, so once I block a few more firing lanes with drums and barrels, we'll call it a day.  As it stands, the crates give the impression of a crowded warehouse with twisty aisles, and that's enough for now.  

Couple of other points to consider.  This room features about the only dead-end in the entire ship down there in the lower right corner of the shot.  The tallest crates are nearest the vent, so that's probably where you've got to climb to get into that one and where you appear when you climb out.

The crates are made out of balsa wood and cardstock, painted up with stamps and labels.  The futuristic skids and pallets are obviously just hex-bases covered with cardstock and painted black.

By the way, Happy New Year if you're into that sort of thing.

Sunday, December 30, 2012

Power Core and Life Support

The lowest level of the big ship now holds the central power core for the craft.  You are looking at (from bottom up) the cap of a gallon of milk, three dowels used to secure wood furniture (think Ikea pegs) between a couple of wooden disks, the cap of a tube of superglue, and a bit of automatic pencil.  The plastic sheath around the three rods was clipped out of the packaging for an iPad cover.  I have no idea where that black bit of pipe came from; it was floating around my bits-box.

Also installed tonight was the small copse of trees featured previously, along with a single palm tree yoinked from my son's toy box.  If memory serves, that came in a desert themed Matchbox car toy.  The toy was already colored, but it needed a paint job to match the rest of the trees in the ship.  The plnater base for the palm tree is a 20mm diameter hex-style base for a 28mm wargame figure.


This whole level will wind up as a hydroponics level. What you see is what we've got for now.  As suitable plants crop up (heh), I'll stick them wherever they fit.  Whatever it takes to shut Bruce Dern up, you know?

Saturday, December 29, 2012

Game On!

The game isn't on for me yet, but it's getting closer all the time.  The game is on for my little mans, because the game room is officially open.
Anyone up for foosball?

Maybe some ping-pong?
And on the table in back you can see a couple of magazines.  Oh, and somebody left out the X-Box controller again.
Most of this stuff is painted on, but the controller is a half a grain of rice glued down to the table.  That table is constructed of two legos - everything else is built from cardstock, balsa wood, and a bit of copper wire for the foosball bars.

Thursday, December 27, 2012

Break On Through

Finally.  The Doors.  You may have noticed that half the doors on the spaceship are really, really tall.  Like this:

There's a reason for that.  I wanted doors that open and close.  This week I built the doors that slide up and down.  Here's a look at the finished product:
The doors go down.

The doors go up.
These are bog standard pocket doors.  They stay open on their own because the fit is so tight.  At the end of the day they wound up a little short, but not enough to make the thing unplayable.  We can half-ass up an in-genre explanation (they are blast door or some such nonsense), but that isn't really necessary.  They look fine as is.

Wednesday, December 26, 2012

Merry After Christmas-Sale Day!

Happy Boxing Day!  In honor of whatever is those kooky Canucks celebrate today, let's all point at Warren and laugh at how he still hasn't learned his lesson.  Remember way back earlier in the year when I spent hours building roads for Car Wars and when they done it turned out they were the wrong scale?  Yeah...welcome to the second verse of that song.

We're gonna need a bigger box.
Whoops.  Finally checked the height of the starship against the tub that it was supposed to be stored in and it ain't even close.  Even if I take off the decorative spire, it still won't fit.  Le sigh.  Oh well, a bigger box will leave more room left over for a second ship, right?

Friday, December 21, 2012

Insert Obligatory 'Still Here' Joke Here

December 21, 2012.  Time to throw out your old Mayan calendar and get a new one.  Let's skip all the obvious jokes, okay?  If you want those, just read Twitter for five minutes - you'll get every single one of them a few dozen times.


On the spaceship front we have my new favorite thing, but first let's look at the progress on the rec room.  A lot of work gives us some new scenery.  The small potted plants are made from old sprue trimmed and painted and stuck in a wooden bit found at the hardware store.  The pots are meant to get stuck into the holes of wooden furniture to cover up deep set screws, but they look like ceramic pots.  Here's a more detailed explanation from the wizards over at TerraGenesis.

And oh, what's that on the telly?  Let's take a closer look...
Even space-orcs love the Doctor.


Thursday, December 20, 2012

It's Worse Than That, It's Gym, Captain

Here's a nice open space for a shoot-out.  The ship's gym comes complete with a futureball court and target, and a sparring/wrestling mat.  I'd hoped to do without the Necromunda style yellow and black striped caution marks, but darn it those patterns just plain work.  The boys at GW were onto something with it, even if they did overuse the pattern.  They tend to do that with things...anyone up for more skulls in their 40k?
Ignore the tall door - I've got plans for that.
The small balls are the heads of sewing pins.  They'll stick quite well, after all they come with their own pins.  If you leave about 2mm of the pin in place, you can smash that into the foamcore for extra security.

 If you look across the big hole you can see a small potted plant.  We'll talk more about those tomorrow, along with a new painting I'm particularly proud of.

Wednesday, December 19, 2012

Bridge Construction

Tell me this bridge doesn't evoke a TARDIS feeling.  That's a basic hex base for a 28mm figure with cereal packet painted with dials, screens, and other controls.  I took the same style syringe cap used for the engines and stuffed it full of green and unpainted toothpicks.  The whole mess fit perfectly wit the bamboo skewer coming down from the nose of the ship.  Green felt serves as carpet and completes the upper bridge.
In scale, that platform is waist-high, so I'll need to add some steps up yet.  The rest of the level is still pretty barren, so we're looking at more control tables and screens somewhere down the road.

Tuesday, December 18, 2012

Little Touches

Every little detail added makes the rocket come alive just a little more.  This shot shows some successes in that department.  The engines are starting to look the part with bright green glowy cores surrounded by plastic casements. (Those are the tops of big syringes over a painted bamboo skewer - I got sloppy with the paint because the plastic obscures the things anyway.)  These still need more pipes and grommits and doo-dads, but that can wait for later; I have to resist the urge to cover the whole darn thing with cover everywhere.

The flooring turned out great.  That's just textured shelf liner paper painted black, highlighted silver, and hit with a touch of brown ink.  Looks metallic and dirty and helps give the lower level a darker, more industrial feel to it.

There's a little red toolbox in the lower right corner, so this will eventually become the machine shop/motor pool (if I can find a small vehicle I want to park here - a Firefly-esque mue would make for some fine cover.

Also notice that the vent now has a red number 'stenciled' on to it.  Enter a vent, and the next turn you come out at a random vent.  While painting these, I realized that the vents are better at getting down to the engine level than up near the bridge; there are two vents on the bottom level compared to one on the rest, so that means you have a 1 in 3 chance of coming out in the guts of the ship.  Which makes sense - it's easier to climb down than up.  That's a neat little feature that smart players will be able to exploit.

Sunday, December 16, 2012

Ladder for the Lads

Like I said - a little drybrushing and those zip-ties really pop as ladders.  If you don't think about it too hard.
This shot gives you glimpses of other design decisions.  The vents turned out just fine, but they still need numbers on them.  The teal and orange will suitably retro-70s-sci-fi, and the kitchen is coming along nicely, too.

Monday, December 10, 2012

Rocket Lessons, Part the Second

Do as I say, not as I do.  I did as I do, and it was a mistake.  So from here on out, I will do as I should have done and would have done, if I had somebody making these mistakes for me the way I'm making them for you.

I'm still convinced that these ladders, made from zip-ties, are going to look great; however, they could have looked great with a lot less effort if I was a bit smarter about things.  Instead of building and then painting, I really should have painted and then built.  

I cut my ties and glued them onto the structure, and that forced me to hand paint each of these little devils.  That took a really long time.  I should have painted them matte-black and then glued them to the walls, it would have meant an extra five minutes to prime them separately from the tower, but would have saved me the four hours of hand painting.  It also would have meant a lot less black smearing around the edges of the ladder.

There is a fix for the smearing.  I just have to mix my acrylic paint to the exact same shade as the tan primer, and then spend more time carefully edging the ladders to cover the smears.  It's not perfect, and it takes time out from other projects, but at least it's a solution.


Tuesday, December 4, 2012

Cheese it Boys, It's the Copse!

This looks like your normal wargame tree stand.  Art posterboard cut into a circle, a few dollar store plastic trees, some rocks, sand, and paint, and it's an instant forest.  In my world it becomes a low-cost oxygen generation machine.  This is designed to fit right into the heart of the spaceship, as seen in the third photo below.


Damn that looks good if I do say so myself.  The small stand of trees will be glued in place once the ship is painted.  Gluing it in place right now will just make it harder to paint the rest of the ship, so that is just going to have to wait.  Note that the whole spaceship has been primed at this point, a nice rich creamy almond color.  It took almost a full can of primer, but the whole she-bang is primed and ready for...more primer?

Yep.  The color is great, but the finish is gloss - the kind of gloss that won't hold the craft store paint on hand.  That means it needs a full coat of clear flat sealer before I can really start in on the painting.  Whoops. Ah well, one more coat won't hurt, and since this color really is perfect for the ship, it's well worth the extra step.

Wednesday, November 28, 2012

First Furniture

Various bits and bobs slapped together make a mighty fine med-tank.  This is the first piece of furniture for what my daughter has taken to calling my space-doll-house.  ("But Daddy, it has a kitchen and everything!) It's not a doll house, it's miniature wargame terrain, and they aren't dolls, they are action figures.  Sheesh.
You probably recognize the black base; it's just a standard hex-base for 28mm miniatures. The clear tube is the top from a hairspray bottle, the vertical tubes are spaghetti noodles, and the yellow bit is the cap to a superglue bottle.  I've been generating a lot of those lately.  It would be nice to leave the clear plastic unpainted, but I'm not sure how well that's going to work out.  Do I spray coat the whole thing and scrape off what I don't need, or skip the spray coat and just basecoat in black with a brush?  Any advice from you folks about in internetlandia?


Tuesday, November 27, 2012

Still in Virtual Orbital Drydock

It's interesting how one design choice leads to another.  The bridge of this ship is calling out for a Tardis-style control panel in the center.  That sets the theme and we're off and running with the circular wall motif on the bridge.  It might not be bigger on the inside, but this ship owes a little something to the Doctor.  Which bothers me not in the least - this thing should have homages to at least five classic sci-fi franchises by the time it's done.
The ladders are zip-ties cut to size and glued next to each other.  The notches that go zip when you use these should look like hand and foot holds after painting.

The kitchen is coming along.  It still needs a few free standing pieces of furniture, but those will have to wait until the initial paint job is done.  There just won't be any way to paint the fridge and cabinets with tables and chairs in the way.

Last shot of the night.  One thing I noticed in my research on sci-fi interior design is that you've got to have really wide molding on the floor.  The pipes and ducts are optional, but you don't see a lot of walls joining floors at a ninety-degree angle.  My version is cardstock, bamboo skewers, and the smallest pipes are spaghetti noodles.  Hopefully, the paint will seal that up and keep it from attracting bugs and such.


Monday, November 26, 2012

Time to Vent

The good ship Everything needs a way to move air around for the meat sacks that pilot it.  The things that eat the meat sacks that pilot it also need a way to move around unobserved.  The meat sacks that pilot the ship need a way to move about for those all-too-often times when the bridge is commandeered by hostile forces. It's three, three, three problems all in search of the same solution - vents!

Rich gamers buy fancy pants vents precast by one of the many fine wargame companies that do such things to separate us hard working types from our well deserved money.  Those of us among the hoi polloi make do, as in most things, with cereal box packing.  I carve a square out of said cereal packing, and then a whole slew of strips the same length as that square and about 2mm wide.  Glue those strips in place, slightly overlapped just like vinyl house siding, and it looks like a directional vent.  Here's three thousand words worth of explanation:

1. Just the square.

2. Slight diagonal overlap.

3. All done but the painting.
The ship has five of these installed, and each will be painted with a different identification number, 1 through 5, stenciled on it.  That's a game decision that comes into play during certain scenarios.

Anything that goes into a vent this turn, pops out on the next turn at a random vent.  Roll a d6 and that's the vent you drop out of.  A 6 means you are lost and have to wait until the next turn.  In cases where the model really knows the structure of the ship (like the Chief Engineer) the character in the vent may have the ability to bump the result up or down one notch.

Wednesday, November 21, 2012

Spaceship Detailing While You Wait

These photos may not look all that different from yesterday's, but they show a three-hour effort to seal up and streamline Major Tom's Rocket. A whole bunch of cereal box cut into 5mm side strips have been plastered to every piece of exposed foam-core to allow for spray painting this piece without melting it.


The start of rocket pods have been added to the bottom-most level as well.  I've got a lot more pieces to add to these (tops of dishwater detergent bottles) to make them look more rockety (rocketish?), but those will have to wait until after the first paint job. In fact, this is one piece of terrain that is going to require careful planning.  I've got a lot of ideas for furniture, but I can't put any furniture in until after I detail the walls and floors.  Just like a real rocket.
The nice thing about this style of construction is that you don't have to get every joint perfectly lined up.  You can always cover seams with piping and detail, as I've done with the long greenish pipe in the corner.  That pipe is covering a gap of about 2mm that no one will ever see.  I'm much better at covering mistakes than avoiding them, so you're going to see a lot of piping in the corners of this project.