Friday, November 30, 2012

More Tens

Those of you that are just here for the 10mm figures can rest assured that we're not done with those.  Tonight I finished painting up my son's Sand Raider infantry pack.  These are Dream Pod 9 figures for the Heavy Gear game.  Darned if I can find a link or even remember what they are called on the package.  My son wants to use them as alien planet local tribesmen...sort of a Red Fremen style guerilla force.

These stand taller than the Pendraken figures that make up the bulk of my forces, approximately 12mm tall to be a little more precise.  To level the playing field a bit, I've left off the washer bases.  That way their heads reach about the same height.  They are meant to be mounted three to a hex-base, and fielded in four base units.  They'll be single mount infantry in my game, same as the rest of the figures.


I can't imagine I'd use these guys for skirmish gaming - Heavy Gear is a giant fighty robot game where these guys play a limited role - there just isn't enough variation in figure to be able to use them for Tomorrow's War without modifying a bunch of squad support and heavy weapon guys.  This is part of the reason I'm bumping up a step to 15mm gaming.  I haven't been at this very long, and already feel that I've done everything I can with 10mm.

Fire Up the Joan Baez

Yep.  This bad boy is going in the spaceship, too.

Wednesday, November 28, 2012

First Furniture

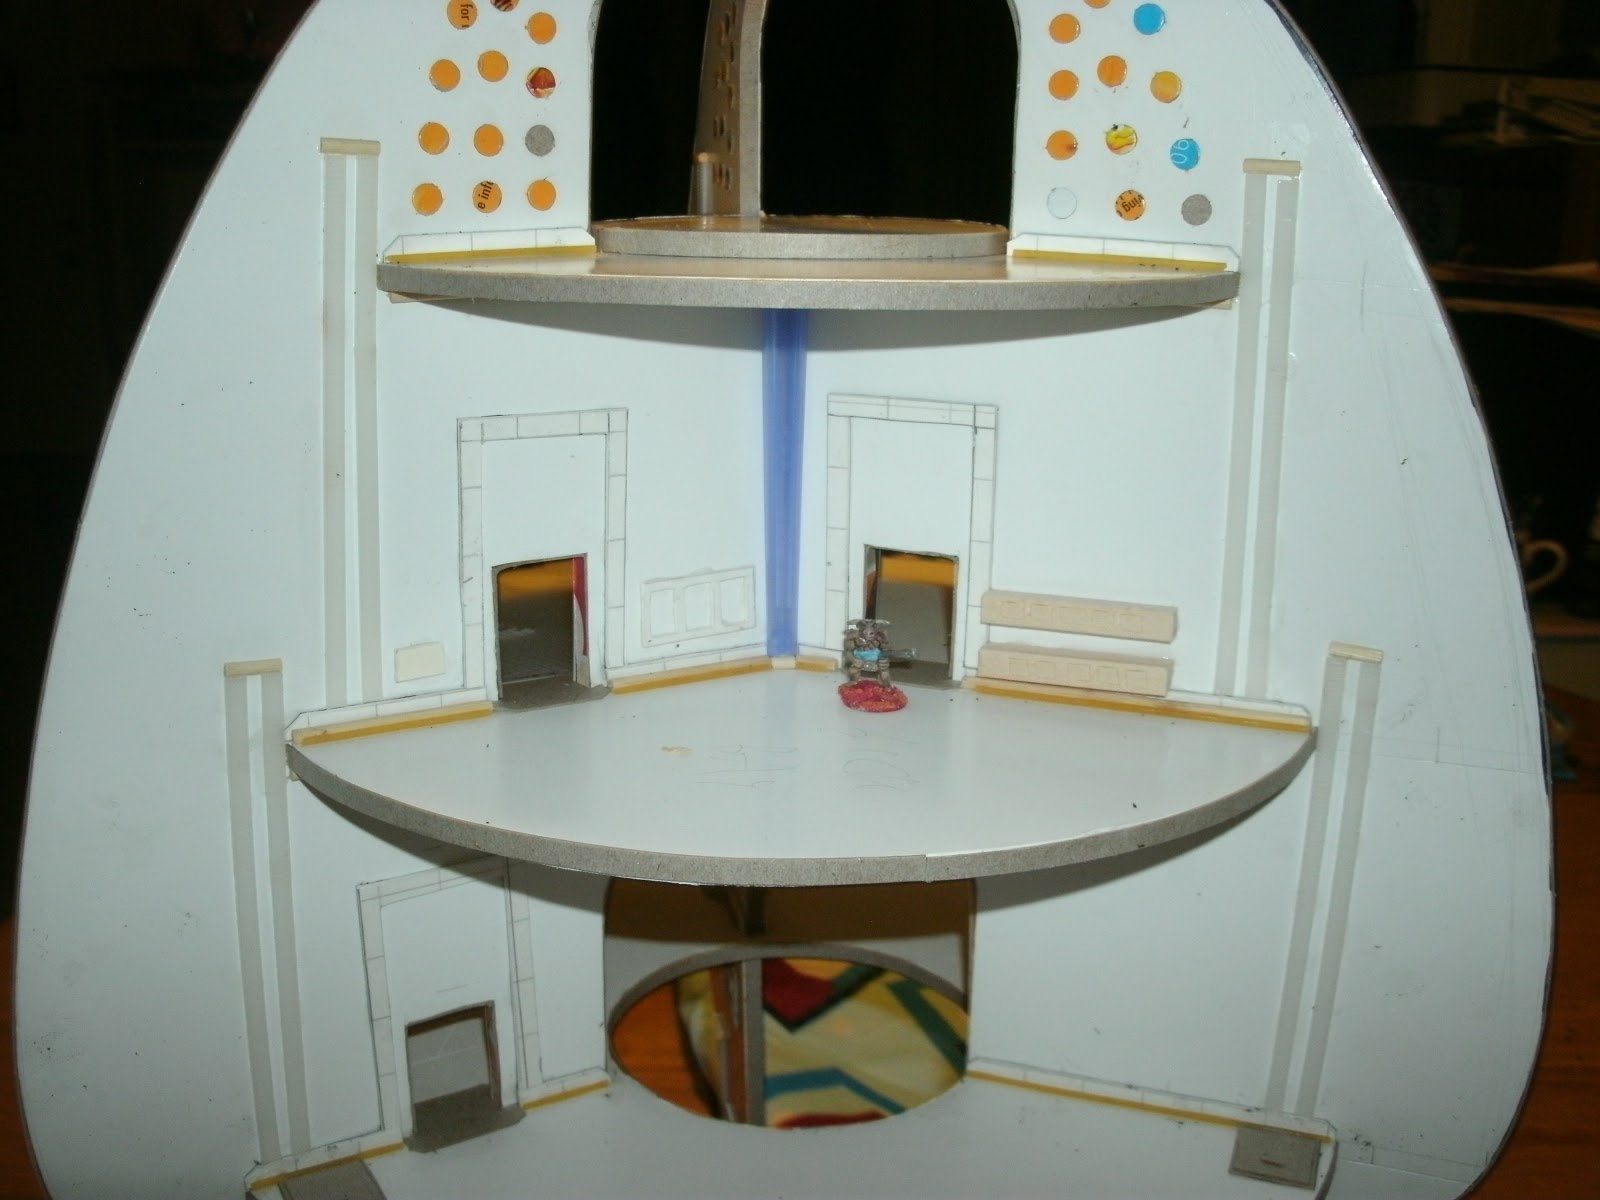
Various bits and bobs slapped together make a mighty fine med-tank.  This is the first piece of furniture for what my daughter has taken to calling my space-doll-house.  ("But Daddy, it has a kitchen and everything!) It's not a doll house, it's miniature wargame terrain, and they aren't dolls, they are action figures.  Sheesh.
You probably recognize the black base; it's just a standard hex-base for 28mm miniatures. The clear tube is the top from a hairspray bottle, the vertical tubes are spaghetti noodles, and the yellow bit is the cap to a superglue bottle.  I've been generating a lot of those lately.  It would be nice to leave the clear plastic unpainted, but I'm not sure how well that's going to work out.  Do I spray coat the whole thing and scrape off what I don't need, or skip the spray coat and just basecoat in black with a brush?  Any advice from you folks about in internetlandia?


Tuesday, November 27, 2012

Still in Virtual Orbital Drydock

It's interesting how one design choice leads to another.  The bridge of this ship is calling out for a Tardis-style control panel in the center.  That sets the theme and we're off and running with the circular wall motif on the bridge.  It might not be bigger on the inside, but this ship owes a little something to the Doctor.  Which bothers me not in the least - this thing should have homages to at least five classic sci-fi franchises by the time it's done.
The ladders are zip-ties cut to size and glued next to each other.  The notches that go zip when you use these should look like hand and foot holds after painting.

The kitchen is coming along.  It still needs a few free standing pieces of furniture, but those will have to wait until the initial paint job is done.  There just won't be any way to paint the fridge and cabinets with tables and chairs in the way.

Last shot of the night.  One thing I noticed in my research on sci-fi interior design is that you've got to have really wide molding on the floor.  The pipes and ducts are optional, but you don't see a lot of walls joining floors at a ninety-degree angle.  My version is cardstock, bamboo skewers, and the smallest pipes are spaghetti noodles.  Hopefully, the paint will seal that up and keep it from attracting bugs and such.


Monday, November 26, 2012

Time to Vent

The good ship Everything needs a way to move air around for the meat sacks that pilot it.  The things that eat the meat sacks that pilot it also need a way to move around unobserved.  The meat sacks that pilot the ship need a way to move about for those all-too-often times when the bridge is commandeered by hostile forces. It's three, three, three problems all in search of the same solution - vents!

Rich gamers buy fancy pants vents precast by one of the many fine wargame companies that do such things to separate us hard working types from our well deserved money.  Those of us among the hoi polloi make do, as in most things, with cereal box packing.  I carve a square out of said cereal packing, and then a whole slew of strips the same length as that square and about 2mm wide.  Glue those strips in place, slightly overlapped just like vinyl house siding, and it looks like a directional vent.  Here's three thousand words worth of explanation:

1. Just the square.

2. Slight diagonal overlap.

3. All done but the painting.
The ship has five of these installed, and each will be painted with a different identification number, 1 through 5, stenciled on it.  That's a game decision that comes into play during certain scenarios.

Anything that goes into a vent this turn, pops out on the next turn at a random vent.  Roll a d6 and that's the vent you drop out of.  A 6 means you are lost and have to wait until the next turn.  In cases where the model really knows the structure of the ship (like the Chief Engineer) the character in the vent may have the ability to bump the result up or down one notch.

Friday, November 23, 2012

Beautiful Asymmetry

Yesterday we talked about the three different styles of stairs.  Today I want to talk about why I didn't just use one template.  It all comes down to asymmetry.

Asymmetry is important from a gamesmanship perspective.  If all three sides of the rocket are identical, that limits the tactical possibilities.  You need to give players those choices between alternate routes, some faster than others, some with more cover than others, to keep them on their toes.  When there's no difference between right and left, the choices don't matter as much.  If the right path is more direct, but heavily guarded, now you've got to balance factors.

This also gives you more scope when it comes to designing scenarios.  If you place that goal point behind a choke point, you get a different game than when you put it somewhere with multiple routes of entry.

In the case of the stairs, the solid staircase blocks off a potential ladder down to the ground floor of the rocket (in this case, the engine room).  There won't be a ladder down on the right hand side of this picture, either.  That forces the little dudes to cross over to the back side of the rocket if they want to get into the bottom room on this picture.
Note also that there's one door on the top level shown in the photo.  There's a great big hole in the floor blocking the front room from the back left.  To get to that room in the back left, you've either got to run around through the door on the right and the back right room, or climb down to the small landing on the left, around the wall, and back up the ladder on the other side.  Going left takes longer.  Going right exposes you to enemy fire while you sprint around the level.  Those are choices that matter, and those are the kind of choices you want players to have to make.

The solid staircase also makes a nice little hidey-hole for tribbles, and you only really need one of those.

Thursday, November 22, 2012

Theme and Variation on Stairs

Among other things, I'm thankful for all of you who check in and make this blog worthwhile.  I've been in a gaming drought for a while, and this helps me feel like a member of the community.  I'm also thankful to live in a time when it is so easy to find so many different figures from so many different small businesses.  This morning I ordered two sets of figures for Major Tom's Spaceship from three different manufacturers on three different continents.  To a guy who cut his teeth on mimeographed* house-rules that's pretty amazing.

Here's the lazy man's way of building stairs:
1. Two bamboo skewers cut to size and glued in place.
2. Build the treads like so. One 2mm wide glued to a 5mm tread.
3. Glue the treads in place as shown.  This preserves line of
sight, and you can even wedge the little mans in place.
Figure for scale.
That's two of the staircases.  I also made one ramp (shown in the back right), and one traditional staircase.  It loses a little consistency, but the ramp provides more cover, and the stairs just plain look cool.  I think so right now, anyway.  I may go back and change it to make all the stairs the same, just to keep the retro-vibe going.

*Note to the under 30 crowd - Google it.